

Surely many, including myself, thought that taking a photo of the Milky Way and edit it could be very difficult, in this small tutorial, you will see that photographing the night sky can be easier than it seems, following some guidelines:
- You will need a tripod that is stable so that the camera does not move during the exposure time.
- A camera that allows manual focus and adjustments.
- A remote trigger or that the camera allows to shoot with delay to avoid any kind of movement.
- A lens or lens to be possible luminous and depending on the landscape, more or less angular.
In my case I had my Olympus E-m10 and a 17mm objective f1.8, and from here, we have to calculate which parameters we will use:
- We will look for a place that is free of light pollution, away from urban centers.
- Inform yourself what days there will be less pollution, either because of the moon or other factors.
- As at first glance, the Milky Way can not be seen, you can use an app that tells you where you are at that moment. I use SkyView Lite.
- First of all, disable all types of software that process noise reduction in images.
- If we use a reflex, we will lift the mirror, to avoid mechanical movements when firing.
- We’re going to shoot raw, to capture all the raw information.
- We will mount the camera on the tripod and compose the image, look for elements in the landscape that help to perceive the magnitude of the environment, if you use a friend (or yourselves) as a better model.
- Let’s help with a flashlight to focus on some element and block that focus in manual mode.
- We adjust the diaphragm the brighter the better, in my case, f1.8
- The ISO will raise it, but not much to avoid a lot of noise, I set it to 1600. (This value has to vary depending on our lens, for example if instead of a value f.1.8 had used f3.6 the ISO should have been double, about 3600.
- And finally we have to calculate the exposure time, we have to think that the sky moves, therefore the stars, the more seconds the more chances of it moving out. Luckily there is a rule that will help us calculate the seconds we need: divide 500 by the focal distance we are using. In my case, my goal was 17mm but that is not the real value because my camera is not a fullframe, you have to know the multiplication factor of your sensor, in my case it is x2, therefore the 17mm becomes 34mm real. If we divide 500/34 = 14.7 this value is the second that at most I have to expose without danger of seeing the sky blurred.
- If you want to play with light, and for example illuminate, as I did, an object, you only have to illuminate a second, otherwise, too long, the photo would be burned.
500 / (Focal distance * Multiplication factor) = Seconds of exposure
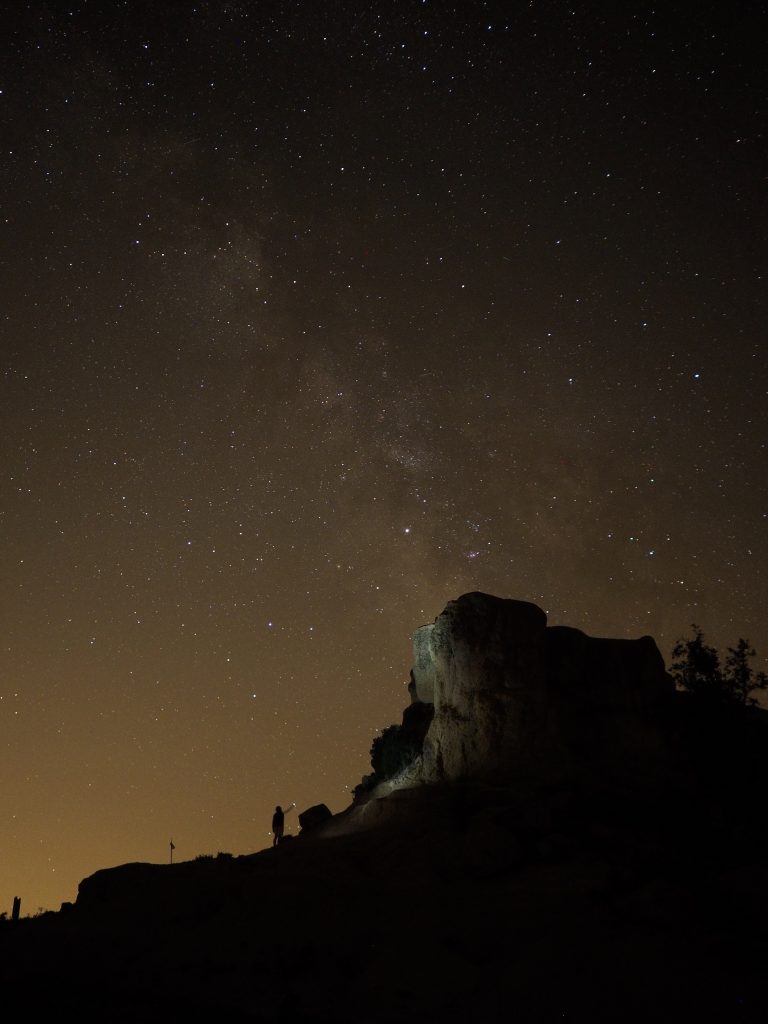
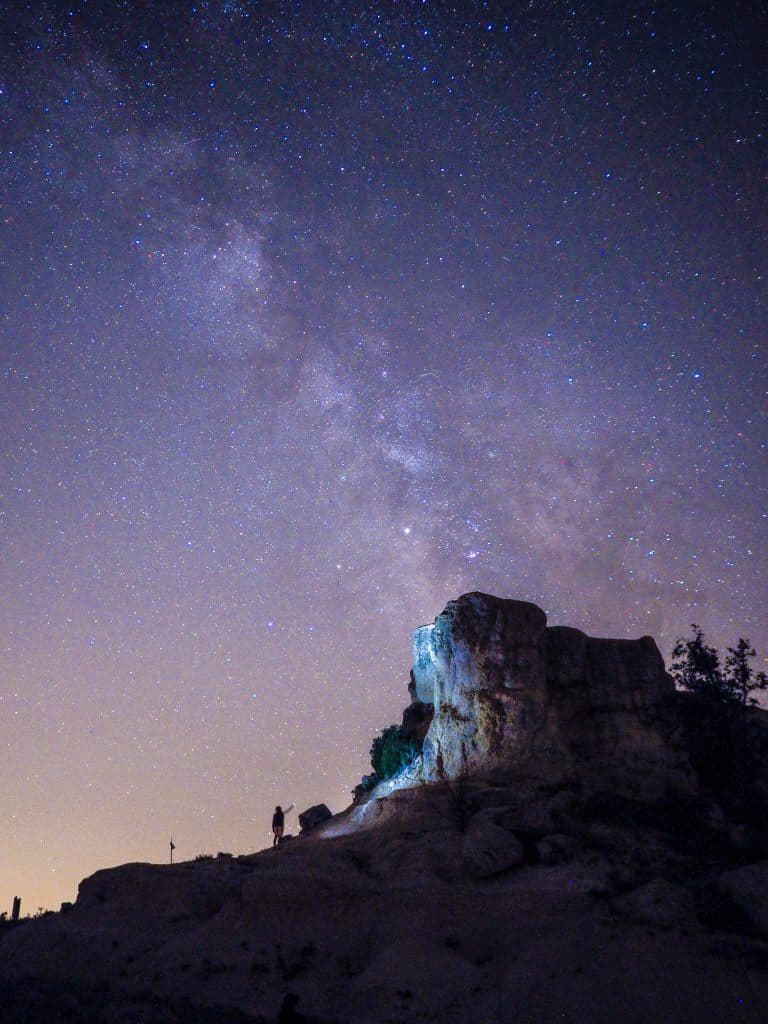
Following the above indications one of the photos I got in raw was this:
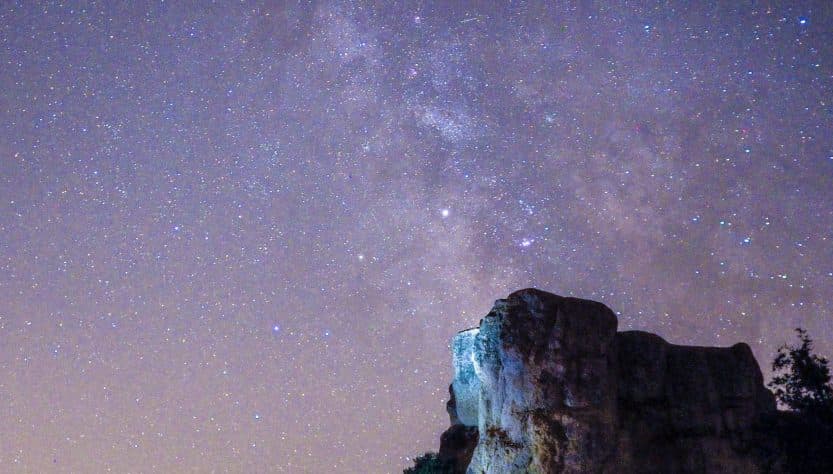
From it we have to edit it to make it look more colorful, that does not mean that we are distorting reality, it is simply an image revealed.
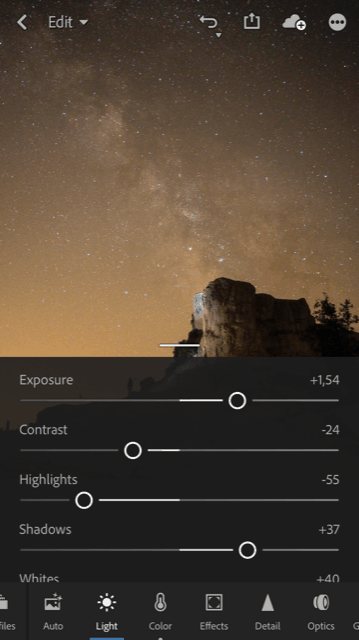
For this, if you are traveling, away from your computer, you can edit with your mobile. In my case I use the LightRoom app, and with it I made the following adjustments:
- First in the light menu, I raised the exposure, I lowered the contrast, I lowered the highlights, I raised the shadows to gain information in the dark areas, I also raised the whites, with that I managed to make the photo more clear and bright, but without overexpose nothing.
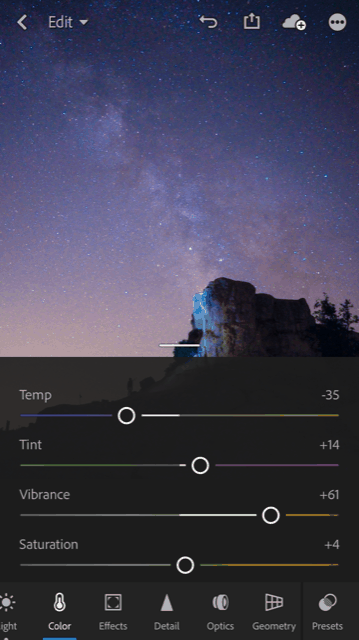
- Now came the turn to color, as the original image was brown due to the light pollution that came from a city that was 30 km away, I began to touch the Temp balance so that the photo had colder tones. The Tint setting I raised a bit to win in violet tones, and finally I raised the vibration to enhance all colors.
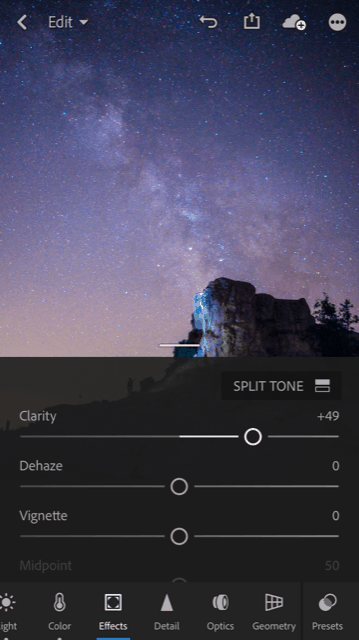
- Finally, in the effects tab, I went up Clarity, to make all the objects, mountains, stars look a little more defined.
You will tell me how your first experience with a starry sky has gone. One last tip, do not go alone, one for safety, the other because it’s more fun to share the results with more people.